Growing Food to Barter
Growing your own food is a great way to prepare for any disaster. When SH!T hits the fan, and you need to withdraw from the cities and built-up areas, there is a good chance that you will become a refugee in your own country.
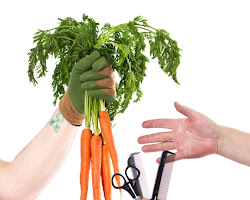
Following some of these tips will help you to be prepared to survive in the chaos that is expected to reign in that situation. Being able to grow food will also give you something to barter with because money will be worthless.
South Africa has a diverse climate, so there are many different types of food that can be grown here. This article is written with the prepper in mind, realising that everything needed will probably have to be transported to your new destination
Choosing the Right Food
When choosing the food to grow, it is important to consider the climate in your area. Some vegetables, such as tomatoes and cucumbers, prefer warm weather, while others, such as lettuce and spinach, prefer cooler weather.
It is also important to consider the amount of space you have available. Some foods, such as corn and potatoes, need a lot of space, while others, such as herbs, can be grown in pots or even plastic bags.
Magic Seed
Most importantly, you will need to have a suitable seed. Make sure it is a heirloom seed so that it blooms and makes seed for the next crop. Most of the seeds out there have been treated and will not make fertile seeds for the next crop.
Preparing the Soil For Food
The soil in your garden should be well-drained and fertile. If the soil is poor, you may need to add compost or manure. You should also test the soil for acidity and adjust the pH level as needed.
Making Compost For Your Food
Start a compost heap as soon as you can, especially if the soil you have is of poor quality.
How to Make Compost
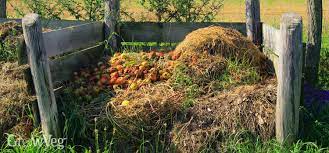
Composting is a great way to recycle organic materials and create a valuable soil amendment. Compost can be used to improve the quality of soil, increase water retention, and reduce the need for chemical fertilizers.
To make compost, you will need a compost bin or pile. There are many different types of compost bins available, or you can make your own. I have seen a compost heap in a wire circle and wooden fences.
Once you have a compost bin, you will need to gather some organic materials. Good materials for compost include:
- Kitchen scraps: Vegetable peels, fruit scraps, coffee grounds, tea bags, eggshells
- Yard waste: Grass clippings, leaves, straw, wood chips
- Manure: Animal manure (not from dogs or cats)
- Other organic materials: Newspaper, cardboard, sawdust
When adding materials to your compost bin, it is important to have a good balance of nitrogen-rich and carbon-rich materials. Nitrogen-rich materials (such as kitchen scraps) are important for providing food for the microorganisms that break down the compost. Carbon-rich materials (such as yard waste) are important for providing structure and aeration to the compost.
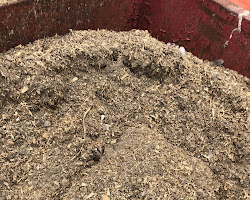
Once you have added materials to your compost bin, you will need to turn it regularly. Turning helps to aerate the compost and speeds up the decomposition process. You should turn your compost bin at least once a week, but more often is better.
Compost will be ready to use when it is dark brown and crumbly. It is important to note that the time it takes for compost to break down will vary depending on the materials you use, the size of your compost bin, and the climate you live in.
Benefits of Composting
There are many benefits to composting, including:
- Reduces waste: Composting helps to reduce the amount of waste that goes to landfills.
- Improves soil quality: Compost adds nutrients and organic matter to the soil, which can improve the quality of your garden or yard.
- Conserves water: Compost helps to improve the water retention of soil, which can help to reduce water usage.
- Reduces the need for chemical fertilizers: Compost can help to reduce the need for chemical fertilizers, which can be harmful to the environment.
- Attracts beneficial insects: Compost can attract beneficial insects, such as ladybugs and bees, which can help to control pests and improve pollination.
Composting Tips
- Keep your compost moist, but not soggy.
- Add a variety of materials to your compost bin.
- Turn your compost bin regularly.
- Be patient! It takes time for compost to break down.
Composting is a great way to recycle organic materials, improve the quality of your soil, and save money on fertilizers, which will probably not be available at that time. With a little effort, you can make your own compost and have another item to barter with.
Using Chicken Manure
Raw Chicken Manure On Your Vegetables

Chicken manure is a great way to improve your soil. It is high in nitrogen, which is essential for plant growth. It also contains other nutrients, such as phosphorus, potassium, and calcium. Chicken manure can be used as a fertilizer or a soil amendment.
To use chicken manure as a fertilizer, you can spread it directly on the soil. However, it is important to note that fresh chicken manure can be too strong for plants and can burn their roots. It is best to compost chicken manure before using it as a fertilizer. This will help to break down the manure and make it less likely to burn plants.
To compost chicken manure, you can create a compost pile or use a compost bin. If you are creating a compost pile, you will need to add a variety of materials to the pile, including chicken manure, grass clippings, leaves, and other organic matter. The pile should be turned regularly to help it break down. Once the pile is finished composting, you can spread it on your soil.
If you do not have the time or space to compost chicken manure, you can buy it from a garden centre. When buying chicken manure, be sure to choose a product that has been composted. Uncomposted chicken manure can be too strong for plants and can burn their roots.
Chicken manure can be used as a soil amendment to improve the quality of your soil. It can help to improve the soil’s structure, water-holding capacity, and drainage. It can also help to increase the amount of organic matter in the soil.
To use chicken manure as a soil amendment, you can mix it into the soil before planting. You can also apply it to the soil throughout the growing season. When applying chicken manure to the soil, it is important to follow the directions on the product label.
Chicken manure is a safe and effective way to improve your soil. It is a good source of nutrients and can help to improve the quality of your soil.
Here are some additional tips for using chicken manure in your garden:
- Do not use fresh chicken manure. Fresh chicken manure is too high in nitrogen and can burn plant roots.
- Compost chicken manure before using it. Composting will break down the manure and make it less likely to burn plants.
- Apply chicken manure to the soil in the fall or winter. This will give the manure time to break down before the growing season begins.
- Do not over-apply chicken manure. Too much chicken manure can make the soil too rich and can lead to nutrient imbalances.
- Test your soil before applying chicken manure. This will help you determine how much chicken manure to apply.
By following these tips, you can safely and effectively use chicken manure to improve your garden soil.
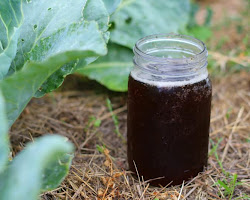
Liquid Chicken Manure
Another way to use chicken manure is to liquidise it. the nutrients go into the water but the liquid manure is still too strong to apply directly to your plants so follow the instructions carefully.
To make liquid chicken fertilizer, you will need:

- 20 litres of water
- 1 kg of chicken manure
- A mesh bag or cheesecloth
- 2 X 20lt buckets with a lids
Instructions:
- Place the chicken manure in a bucket.
- Fill the bucket with water.
- Stir well
- Put on the lid.
- Let the mixture sit for 7 days.
How to use the liquid fertiliser in Your Food Garden
- Dilute the fertilizer with water before using it. A good ratio is 1 part fertilizer to 10 parts water.
- Apply the fertilizer to the soil around your plants. Do not apply it directly to the leaves of the plants.
- Fertilize your plants every 2-3 weeks during the growing season.
- Do not over-fertilize your plants. Too much fertilizer can damage the roots of your plants.
By following these tips, you can safely and effectively use liquid chicken fertilizer to fertilize your plants.
Here are some of the benefits of using liquid chicken fertilizer:
- It is a natural fertilizer that is good for the environment.
- It is a good source of nitrogen, which is essential for plant growth.
- It is easy to make and use.
- It is a cost-effective way to fertilize your plants.
- You can use it to barter for other necessities.
If you are looking for a natural and effective way to fertilize your plants, liquid chicken fertilizer is a great option.
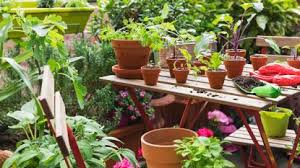
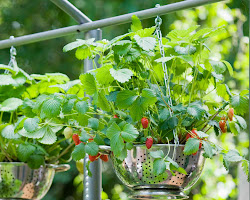
Planting in Containers
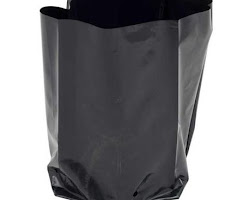
The first step is to choose the right containers for your plants. You will need to consider the size of the vegetables you want to grow, the amount of sunlight your area gets, and the type of soil you have. remember, you have to transport it all so, maybe use the black bags made for planting. You get many different sizes and they are lighter and take up less space than pots, although they are not as durable.
- Size: Vegetables need different amounts of space to grow. For example, tomatoes need a large container, while herbs can be grown in a small pot.
- Sunlight: Most vegetables need at least 6 hours of sunlight per day. If your area does not get enough sunlight, you may need to use grow lights.
- Soil: Vegetables need well-drained soil that is rich in nutrients. You can buy special potting soil for vegetables, or you can make your own by mixing together equal parts of garden soil, compost, and sand.
Planting your vegetables
Once you have chosen your containers, you are ready to plant your vegetables. Be sure to follow the planting instructions on the seed packet.
- Dig a hole in the soil that is the same depth as the root ball of the plant.
- Place the plant in the hole and backfill it with soil.
- Water the plant thoroughly.
Fertilizing your vegetables
Vegetables need regular fertilization to grow healthy. You can use a commercial fertilizer or a natural fertilizer, such as compost tea.
- Fertilize your vegetables every 2-4 weeks.
- Follow the directions on the fertilizer label.
Watering your vegetables
Vegetables need regular watering, especially during hot weather. Be sure to water your vegetables deeply, so that the water reaches the roots.
- Water your vegetables when the top inch of the soil is dry.
- Water in the morning so that the leaves have time to dry before nightfall.
Pests and diseases
Vegetables are susceptible to pests and diseases. Be on the lookout for problems and take steps to control them as soon as possible.
- Check your vegetables regularly for pests and diseases.
- Remove any infected leaves or plants.
- Use pesticides or fungicides only as a last resort.
Harvesting Your Food
When your vegetables are ready to harvest, cut them off with a sharp knife or shears. Be sure to harvest them when they are young and tender.
- Harvest your vegetables in the morning when they are cool and fresh.
- Store your vegetables in a cool, dark place.
With a little care and attention, you can grow your own vegetables in containers. It is a rewarding experience that can provide you with fresh, healthy food for your family.
Additional tips
- If you live in a cold climate, you may need to bring your containers indoors during the winter.
- You can also grow vegetables in hanging baskets or window boxes.
- There are many different types of vegetables that you can grow in containers. Some popular choices include tomatoes, peppers, cucumbers, lettuce, and herbs.
- Experiment with different types of vegetables to find what you like best.
ter.
Here are some of the most popular food plants to grow in South Africa:
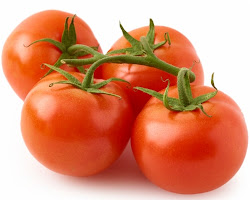
- Tomatoes: Tomatoes are a warm-weather crop that can be grown in most parts of South Africa. They are a good source of vitamins A and C. Farmer’s Weekly
- Cucumbers: Cucumbers are another warm-weather crop that can be grown in most parts of South Africa. They are a good source of vitamins K and C. Farming
- Potatoes: Potatoes are a cool-weather crop that can be grown in the winter in South Africa. They are a good source of carbohydrates. Farmer’s Weekly
- Onions: Onions are a cool-weather crop that can be grown in the winter in South Africa. They are a good source of vitamins C and K. Seeds and Plants
- Lettuce: Lettuce is a cool-weather crop that can be grown in the winter in South Africa. It is a good source of vitamins A and K. Farmer’s Weekly
- Lettuce: Lettuce is a cool-weather crop that can be grown in the winter in South Africa. It is a good source of vitamins A and K. Farmer’s Weekly
- Spinach: Spinach is a cool-weather crop that can be grown in the winter in South Africa. It is a good source of vitamins A, C, and K. South Africa
Aquaponics
Aquaponics is a sustainable method of growing plants and fish together in a closed-loop system. The fish provide nutrients for the plants, and the plants help to filter the water for the fish. This system can be used to grow a variety of vegetables, herbs, and fruits, as well as some types of fish.
Tank Design and Construction
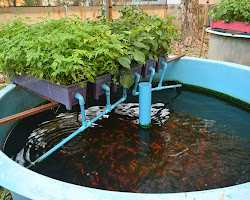
The first step in setting up an aquaponic system is to design and construct the tanks. The fish tank should be large enough to accommodate the number of fish you plan to raise, and it should have a filter to remove waste products from the water. The grow bed should be sized to accommodate the number of plants you plan to grow, and it should have a porous medium to allow the roots of the plants to absorb the nutrients from the water.
Water Preparation
The water in an aquaponic system needs to be clean and free of harmful bacteria. To prepare the water, you will need to add a de-chlorinator to remove chlorine and chloramine, and you may also need to add a pH balancer. You should also test the water regularly to make sure that the levels of nutrients and minerals are correct.
The Best Type of Fish
The best type of fish for aquaponics is a hardy species that is not susceptible to disease. Some good choices include tilapia, catfish, and goldfish. You should avoid fish that are known to produce a lot of waste, such as koi and goldfish.
Growing Mediums
The growing medium in an aquaponic system is the material that the roots of the plants grow in. Some popular choices include gravel, sand, and expanded clay pebbles. The growing medium should be porous and allow the roots of the plants to get plenty of oxygen.
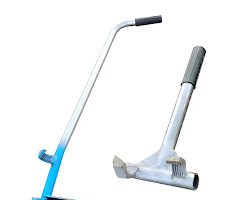
How to Make a Bell Syphon
A bell syphon is a device that is used to automatically circulate the water in an aquaponic system. To make a bell syphon, you will need a piece of PVC pipe, a rubber stopper, and a weight. Cut the PVC pipe to the desired length, and drill a hole in the side of the pipe near the bottom. Insert the rubber stopper into the hole, and then attach the weight to the other end of the stopper. When the water level in the fish tank rises, it will fill the PVC pipe. When the weight is submerged, it will pull the water out of the pipe and into the grow bed.
Maintenance
Aquaponic systems require regular maintenance to ensure that they are functioning properly. You will need to test the water regularly, add nutrients as needed, and clean the tanks and grow beds on a regular basis. You should also monitor the fish for signs of illness, and quarantine any new fish that you add to the system.
Aquaponics is a great way to grow fresh, healthy food without using pesticides or herbicides. It is also a sustainable way to raise fish, as the water is recycled and reused. If you are interested in learning more about aquaponics, there are many resources available online and at your local library.
Building Your Own Greenhouse with PVC Pipe
Design and Build Instructions For a Vegetable Greenhouse
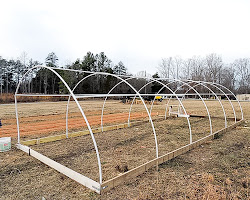
A 4-meter x 3-meter greenhouse is a good size for most home gardens. It will be large enough to grow a variety of plants, but not so large that it is difficult to maintain.
The following are the basic steps involved in building a PVC greenhouse:
- Choose a location. The greenhouse should be located in a sunny spot that gets at least 6 hours of direct sunlight per day. It should also be sheltered from the wind.
- Prepare the site. The ground should be level and free of debris. If the ground is not level, you will need to create a raised bed.
- Build the frame. The frame can be made from PVC pipe and connectors. The pipes should be cut to the following lengths:
- 8 pieces at 2 meters long
- 12 pieces at 1 meter long
- 4 pieces at 3 meters long
The connectors will be used to join the pipes together.
- Attach the plastic sheeting. The plastic sheeting should be attached to the frame using staples or screws. The sheeting should be secured at the top, bottom, and sides of the greenhouse.
- Add a door. The greenhouse should have a door for access. The door can be made from PVC pipe and plywood.
Tools and Materials Needed
The following tools and materials are needed to build a PVC greenhouse:
- PVC pipe
- Connectors
- Plastic sheeting
- Staples or screws
- Saw
- Level
- Tape measure
- Hammer
- Drill
- Plywood
Cut List for PVC Pipe
The following is a cut list for the PVC pipe needed to build a 4-meter by 3-meter greenhouse:
| Length | Quantity |
|---|---|
| 2 meters | 8 pieces |
| 1 meter | 12 pieces |
| 3 meters | 4 pieces |
drive_spreadsheetExport to Sheets
List of Connectors
The following is a list of connectors needed to build a PVC greenhouse:
- T-connectors
- Elbow connectors
- Couplings
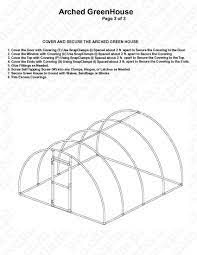
Diagram (Plan) of the Greenhouse
The following is a diagram (plan) of a 4-meter by 3-meter greenhouse. Click on the image for detailed plans and instructions.
Tips
- When building the frame, make sure that the joints are secure. The greenhouse should be able to withstand wind and storms.
- Use high-quality plastic sheeting. The sheeting should be UV-resistant and water-proof.
- Add a door to the greenhouse for access. The door should be made from durable materials.
- Place the greenhouse in a sunny spot. The greenhouse should get at least 6 hours of direct sunlight per day.
- Water the plants regularly. The plants should be watered when the soil is dry to the touch.
- Fertilize the plants regularly. The plants should be fertilized every 2-4 weeks.
- Pests and diseases can be a problem in greenhouses. Check the plants regularly for pests and diseases.
With a little planning and effort, you can build a cheap and effective PVC greenhouse. The greenhouse will provide a warm and sunny environment for your plants to grow and thrive.
Here are some tips for growing vegetables in South Africa:
- Buy only heirloom seeds to ensure seed for the next crop.
- Choose the right vegetables for your climate.
- Prepare the soil well.
- Water your vegetables regularly.
- Fertilize your vegetables every few weeks.
- Watch for pests and diseases.
- Harvest your vegetables when they are mature.
With a little planning and effort, you can grow your own vegetables in the event of chaos in the RSA. It is a rewarding experience that will give you fresh, healthy food, and also give you extra items to barter with.

“It is better to have prepared and never to need it than to be unprepared and be in desperate need of it”.
Be Aware. Be Safe. Be Prepared!