The word “Pemi” is the Cree word meaning Fat or grease and Pemmican was probably the first MRE (Meal Ready to eat). It was also the traditional means of preserving the buffalo meat that the Native North Americans used when they went on their annual Buffalo hunt.

They needed to preserve the meat for the long trip back to their traditional homes. The meat also had to last, without spoiling until the following Buffalo hunt.
This food source was adopted by the hunters and travellers in the later years and often became the staple, if not the only diet of these hunters and travellers. There are reports of hunters living on pemmican alone for up to 2 years. This made pemmican ideal for army rations and ships rations.
It is now known as an ideal, High Protein meal used by hikers, campers, and travellers and is also an ideal emergency ration for preppers and for when cooking is not possible in emergency situations.
This is a versatile food that can be modified in many ways to suit your need. There are many recipes where various different berries, spices and other foods are included in the pemmican. A word of caution in this regard. Although it makes a practical and nutritious meal for on the road, hiking, camping and fishing etc, if you add items to your pemmican, don’t expect it to last two years.
Pemmican’s shelf life is dependent upon the amount of moisture and the shelf life of the items that you add to the pemmican. If you make it as an MRE, and you are going to use it within the next month or so, adding suitable “extras” can turn this food into a really nice meal. Pemmican is also a really cost-effective way to store meat if you do not have a refrigerator or for emergency situations
The recipe that I am showing here today is the base recipe with no extras added. Pemmican has been found to be edible when it was 50 years old, although I am not so sure I would have the confidence to try it at that age.
What You Need
Here is a list of what you will need for this recipe:-
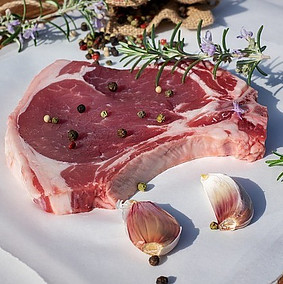
- 1kg of Lean beef (grass fed if possible)
- 400grams of beef fat
- salt
- Cutting board
- Sharp knife
- Kitchen scale
- two bowls
- 2 cake cooling racks or oven racks
- a pot
- disposable plastic gloves for working with food.
- Ziploc bags or airtight container
Cut The Meat
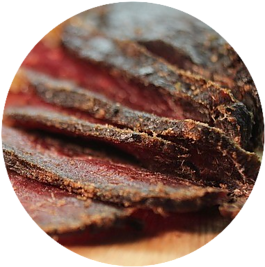
The secret to pemmican is drying the meat properly. In the old days, they used to leave it on drying racks and it took days to dry. Nowadays, we dry the meat in the oven in less than 15 hours.
In order to dry the meat properly, the first thing that you need to do is to cut the meat into thin strips. The thinner the strips, the better and the quicker they will dry. Remember, we want to dry the meat so we are not going to dry it by placing it in a how oven.
Once you have cut all the meat into thin strips, you need to place it on the cake racks or oven racks. The meat should not touch another piece of meat so that the air can pass through the meat without obstruction and all the meat is exposed to the air.
Dry The Meat

Place the racks as high in the oven as possible and switch the oven on to the lowest heat that it will go. Leave the oven door open a crack, if necessary, place a wooden spoon in the door to hold it open two or three cm. This is to allow the air to circulate and prevent moisture build-up.
I usually time my preparations so that I can put the meat into the oven at about 16:00 (4 pm). It should then be ready by 07:00 (7 am) the next day. Test the meat. If it bends and does not break, it is probably not properly dry. Some thicker pieces might not break completely but will crack like a branch. Check them and ensure that they are properly dry.
Remove the racks from the oven, switching the oven off and let the meat cool.
Pulverise The Meat
Once the meat has cooled, it is time to pulverise the meat to dust….or almost dust. In the days gone by, it was a tedious hand job that took almost as long as it takes us to dry the meat. Luckily we have electricity and BLENDERS to make our lives easier 🙂
Place the meat in the blender a little at a time, and blend it until it is really fine, almost dust. The finer the meat is, the better your pemmican will be. Once it is all fine, place it in a bowl and place it on one side.
Render The Fat
Please don’t try to render the fat down without cutting it up into little blocks. I like to cut it into chunks of about 2 cm square as this helps it renders quicker. The idea is that we want the liquid fat, minus the water, without having to heat the fat to high a temperature.
Once the fat is cut up, place it in a pot which you can place on the stove at a medium heat. As soon as you can hear the “Snap, Crackle and Pop” of the rice crisp….sorry, the fat, you can turn down the heat. You will need to stir the fat every minute or so until the liquid fat starts to collect at the bottom of the pot.
Once there is sufficient liquid in the bottom of the pot you can now stir it every 5 minutes or so until there is 1cm or so of liquid in the pot. When you reach this stage, you can stir every 10 to 15 minutes, depending on your stove’s temperature. Let the fat cook until all the fibre is now crispy. This will indicate that the water has now all cooked away.
You can now strain the fat (I use a coffee filter) to make sure that there are no solids in the fat. Place it on one side and let it cool a little.
Weigh And MixThe Meat and Fat

Pemmican is a mixture of meat and fat. So, as you now have both prepared, you can now weigh the meat and see how much you have. You then weigh out an equal amount of fat. If the fat is now solid, you will have to melt it again but do not be in a hurry and overheat it. It just needs to be a liquid.
Once you have an equal amount of meat and molten fat, by weight, you can now add the fat to the meat. You will need to put your gloves on and mix it by hand and rub the fat into the meat, ensuring that all the meat is coated with fat.
You need to make sure that you have coated all the meat with the fat as it is this coating of fat that protects your meat from coming into contact with oxygen and spoiling.
Moulding, Packaging And Cooling The Pemmican
Now that the pemmican is properly mixed, it is ready for eating or cooling. It can be eaten as is or it can be placed into forms and left to cool. On average, a person needs just about 500grams of pemmican per day. In order to make dispensing the pemmican easy, try to package the pemmican in 200-gram packs/slabs. As people require different amounts, you will have to break the pieces to consume the correct amount per meal.
I would suggest weighing the pemmican out into 200g balls and then placing them into a Ziploc bag. Leaving the bag open, press the bag flat, spreading the pemmican and forcing out as much of the air as possible before closing the bag. I am personally not keen on Ziploc bags but it seems to be the done thing, but I would recommend that you pay special care to ensure that the bags of pemmican are kept in a cool dry place for best preservation.
How to use The Pemmican
Well, this is an easy question to answer… You eat it! Yes, I know, but the truth is that you can eat it as you please. You can eat it as is, if you have veggies, you can add it in and make a lovely stew or even make a soup out of it. Why not warm it slightly and have it on crackers or bread, as a spread. It all depends on your circumstances and your taste preferences.
Nutritional Value

Pemmican contains fat, protein, and vitamins and minerals that our body needs to function. Just 544g of Pemmican contains the following nutritional benefits:
1 days supply of pemmican (544g) supplies ~ – 0 calories from carbohydrates (0g) – 4050 calories from fat (450G) – 384 calories from protein (96g)
Total calories = 4434
You will notice the 0 Calories from carbohydrates quoted above. This is ideal as your body does not really need Carbs. Fats will provide you all the energy you need and more.
In the video, I mentioned grass-fed beef or venison. Here is why – The grain-fed animal’s fat is only 2 to 3 percent Omega 3. Omega 3 fatty acids are one of the three essential fatty acid groups contained in tallow and are critical to the development and maintenance of our brain and nerve tissue. And here we have not mentioned all the other “stuff” injected and fed to the animals.
Conclusion
Pemmican is an amazing tried and tested way to preserve meat and still get amazing nutrition from the meat even if it is up to 10 years old and has never seen a refrigerator. This lightweight and relatively cheap, homemade food will do you far more good than any of the commercially produced “preserved” foods that you buy in the local store.
Whether you are a prepper, a camper, a fisherman or a hiker, this food would serve you well and its proven track record should instil confidence. Preparing pemmican is certainly a skill that would serve you well at home, on the trail or on the road.
If you have any questions, please ask them here.
Your opinion counts, If you have a comment or suggestion, please leave them below.

“It is better to have prepared and never to need it than to be unprepared and be in desperate need of it”.
Be Aware. Be Safe. Be Prepared!


